easy steps to draw a tree frog
Would You Like to Draw a Frog?
If you've ever wanted to learn how to draw a frog then this article is just for you.
This is quite an easy frog to draw but if you would rather go straight into colouring then there's a frog colouring page that you can download and start painting right away!
Start the Frog's Head
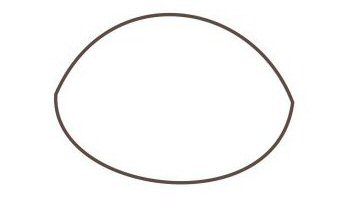
A Flattened Disc for the Head

Draw two curves, one facing upwards and the other downwards. They should meet at the ends and the result should look somewhat like a slightly flattened circle.
Draw the frog with a pencil.
Later on you'll need to rub out some construction lines so try and use a fairly light touch.
Quick Links:
Start the Frog's Head
Draw the Frog's Body
The Arms
Draw the Frog's Legs
Hands & Feet
Remove Construction Lines
Add Some Colour
Download the Line Art
How to Draw the Frog's Eyes Hoods
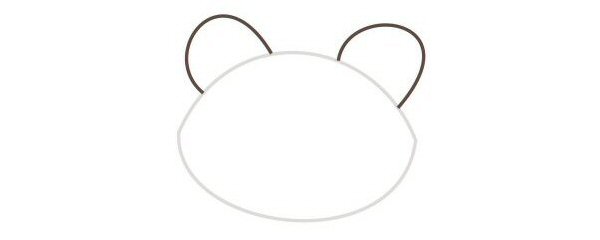
Next draw two half oval shapes on the top edge of the head. These are the hoods of the frog's eyes.

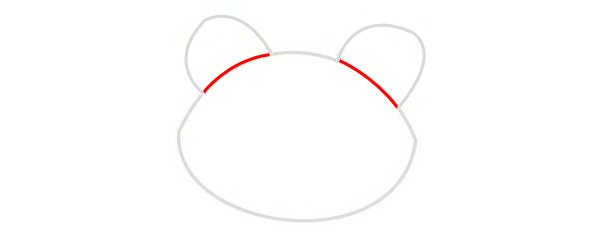
Remove Construction Lines
Now remove the section of the head where it intersects with the eye hoods, shown in red in the image below.

Eye Whites and Pupils
Moving on to the eyes themselves. First draw two circles within the eye hoods. Make them extend a little into the head area. These are the whites of the frog's eyes.

Next draw pupils for each of the eyes. You can draw them facing any direction you want.
Mouth and Nose
Draw two curves for the mouth. Start them at the point where the upper and lower lines of the head meet.
Make one curve deeper than the other to give a nice smiling mouth.
Then give the frog a tongue that touches the bottom curve. The tongue is simply a curve that dips a bit in the middle.

Two little circles in the middle of the face make nostrils for the frog's nose.

And that's the frog's head, not too hard at all.
The Frog's Body and Limbs
Having drawn the frog's head let's move onto its body and limbs.
Draw the Frog's Body
Draw a loop from one side of the head to the other, just below the mouth corners. This is the main outline of the body.

Two more curves within the body loop help to suggest the frog's chest area. These two curves start on the underside of the head and end on the main body loop.
And then the Arms
Two slightly curved lines make up each arm.
First draw a line touching the outer side of the body as shown. Then draw a second line close to the chest. Try and make the two lines slope in roughly the same direction.

Do the same for the second arm but be sure to do it in reverse!
Next draw the Frog's Legs
The frog's legs are a bit involved but you shouldn't find it too difficult. Each leg is drawn with three lines.
The first curved line looks a bit like an incomplete 'S' attached to the side of the body, this is the outer thigh and calf/ankle of the frog.
The second is a short straight line that starts close to the ankle and ends on the outer arm.
Finally draw a short curved line to represent where the bottom of the frog's thigh meets the top of its calf. This third line starts on the body.

A Second Leg
The second leg is drawn like the first, just in reverse.

Draw the Frog's Feet and Hands
Our frog's feet attach, as you would expect, to the ankles. There are three toes on each of its feet, the middle toe is longer than the outer two. Try and give each toe a little round knob the end.


The hands are draw the same way as the feet, just smaller and with the middle finger closer in length to the other two.
A Few More Construction Lines
Remove the extra lines where the arms cross over the body, shown in red below.

The Frog Drawing is All Done
Croak croak!

Complete the Frog with Some Colour
Colour in the frog with whatever tools you have to hand. Have fun with colours, textures and props.

Download the Line Art
If you've enjoyed this post then you might want to have a look at how to draw a bunny.
Source: https://www.tinalewisart.com/how-to-draw-a-frog/
0 Response to "easy steps to draw a tree frog"
Post a Comment